
Weaving in Grade 3
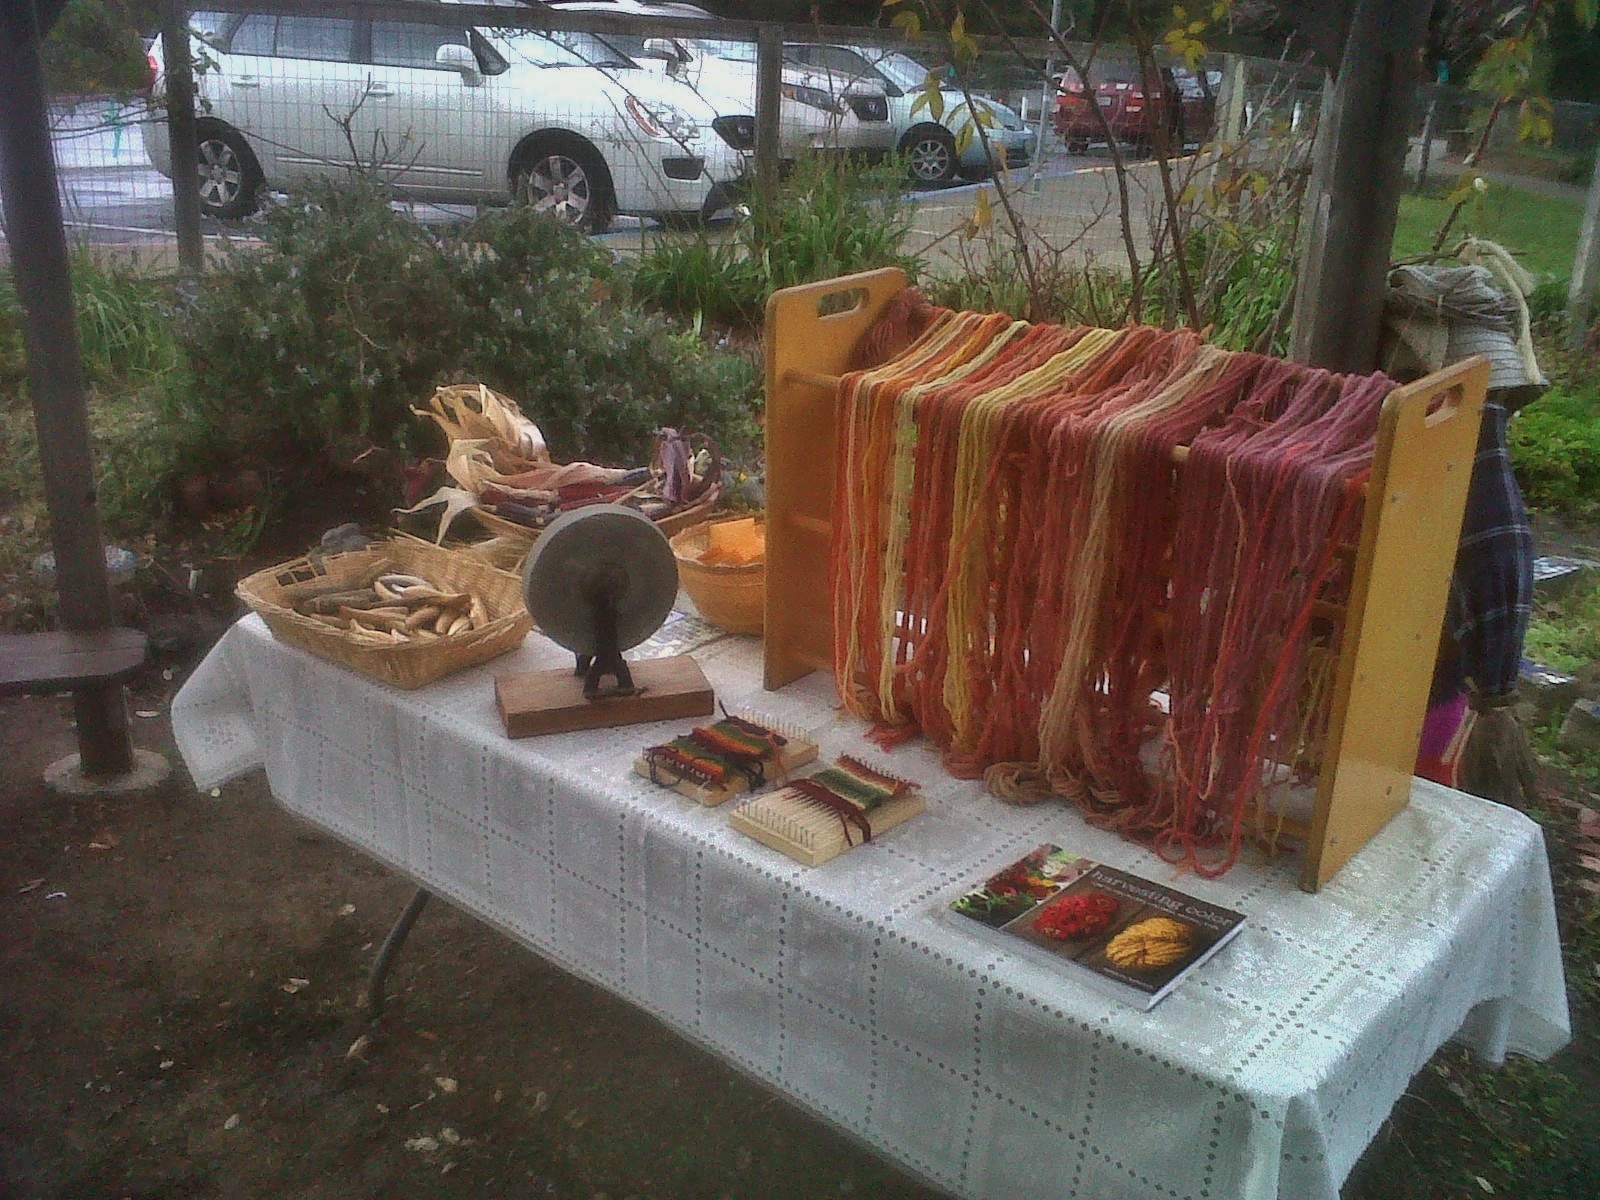
Natural Dyed Wool
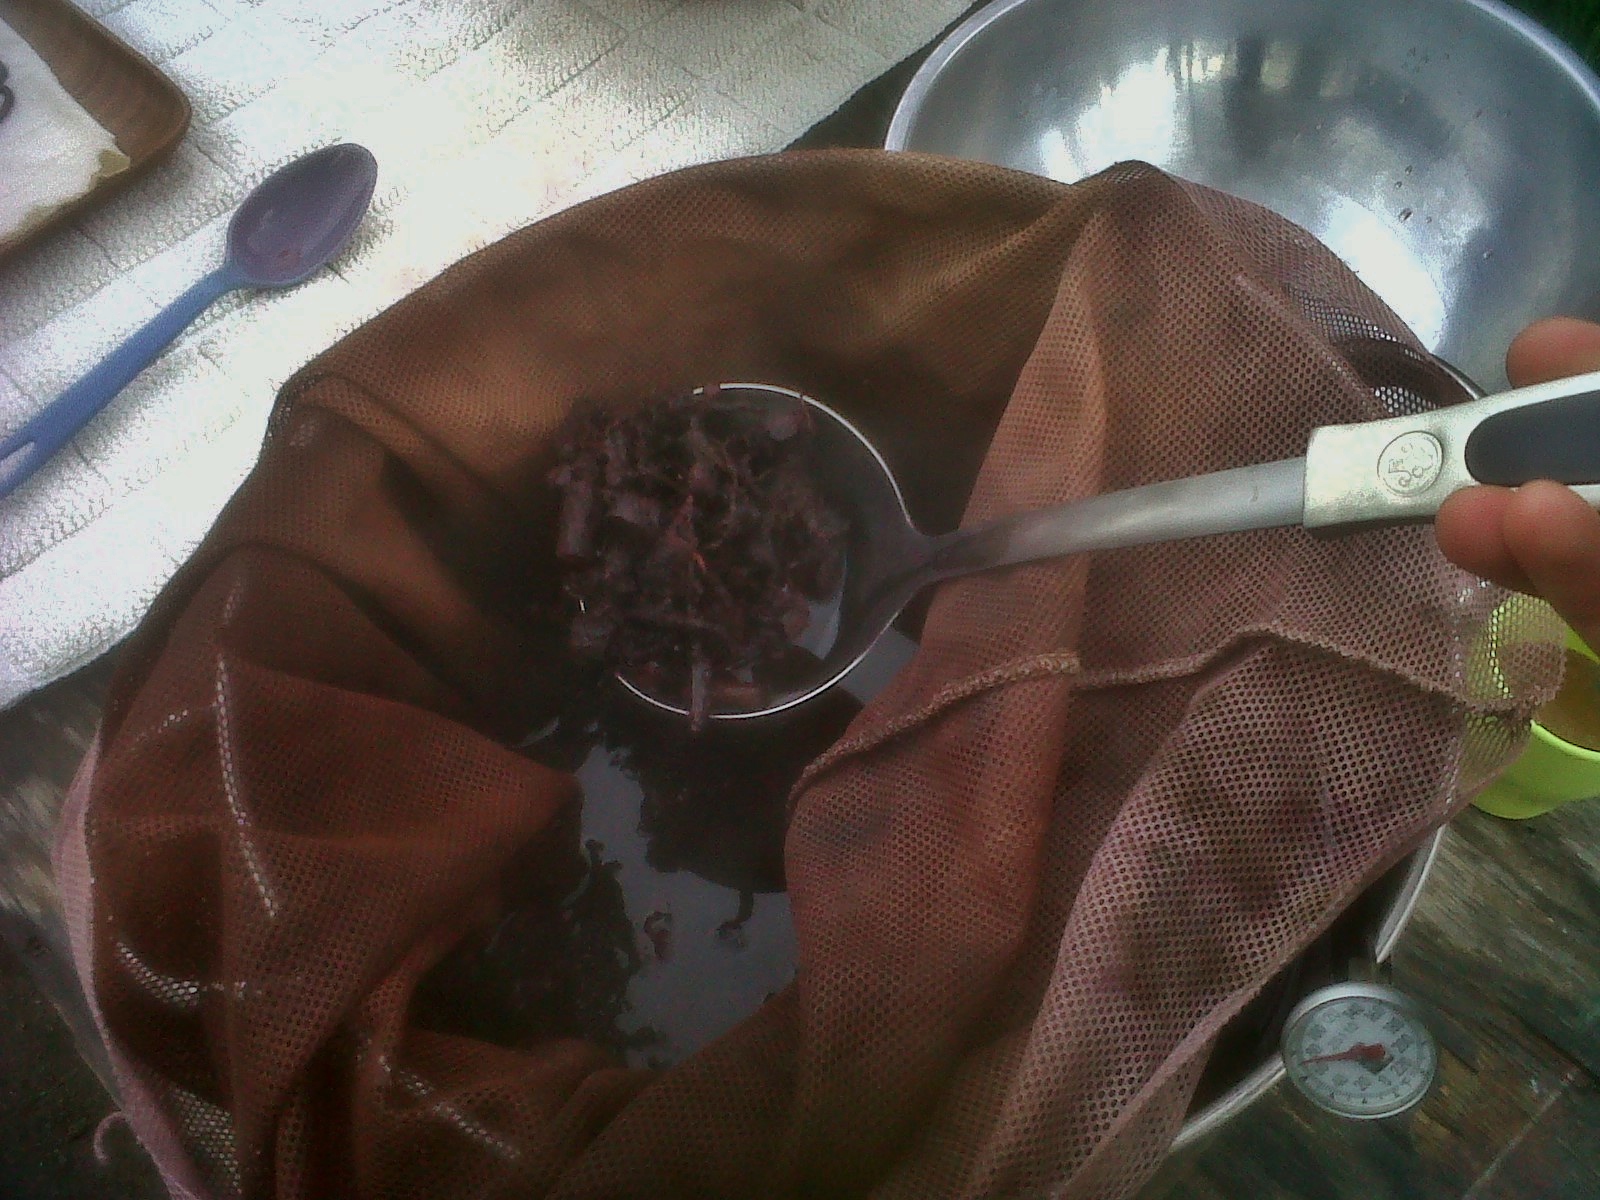
Madder Root Dye Bath
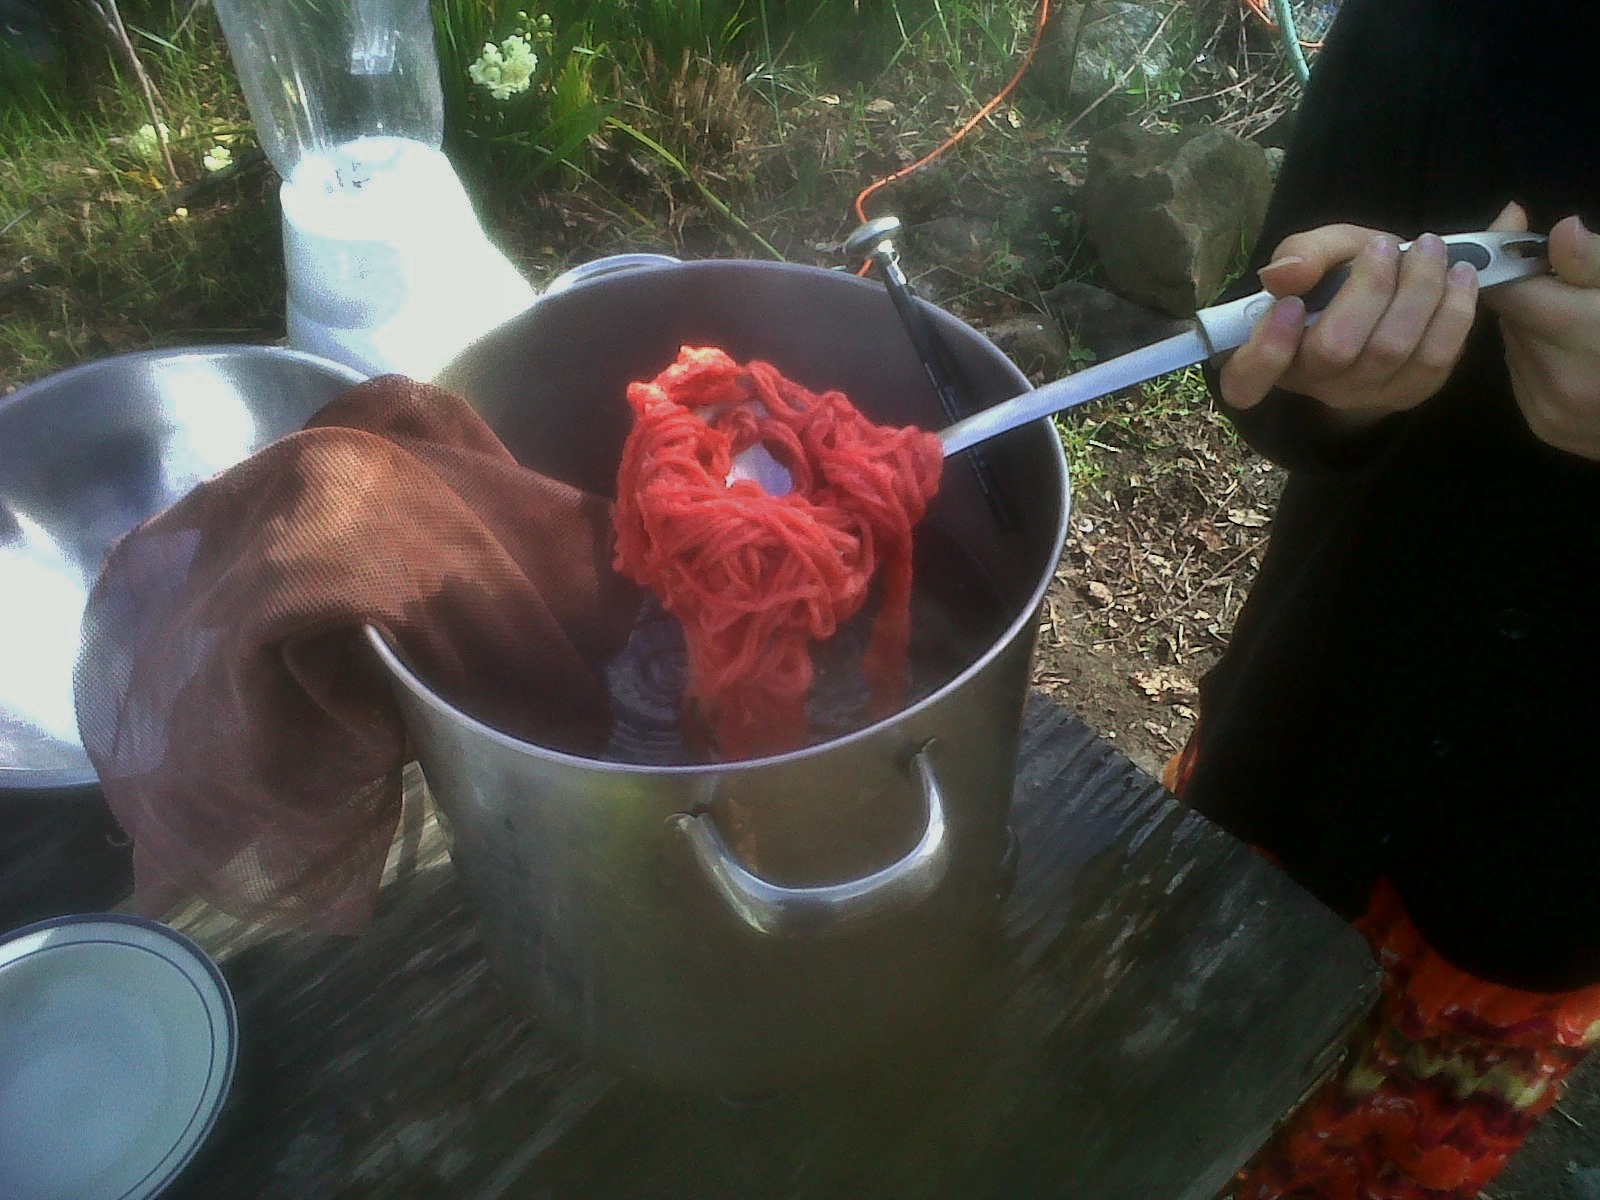
Madder Root Natural Dyed Wool
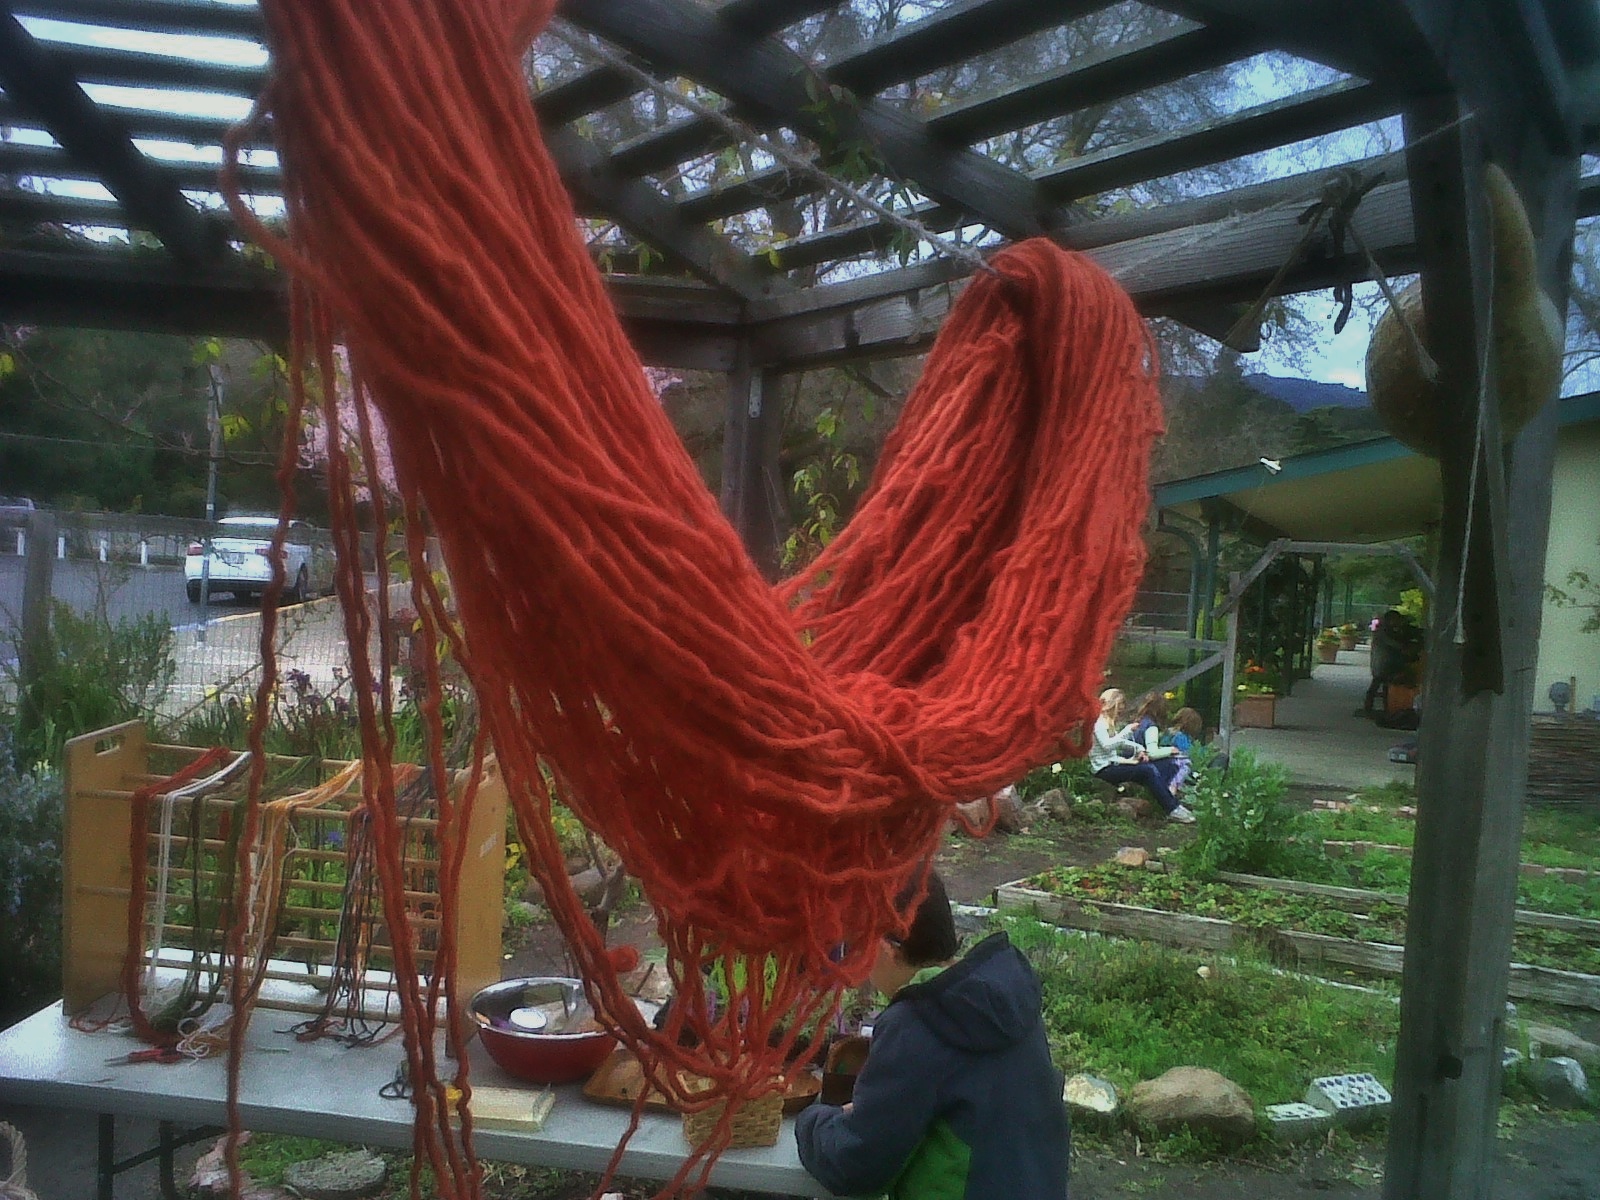
Madder Root Natural Dyed Wool Drying
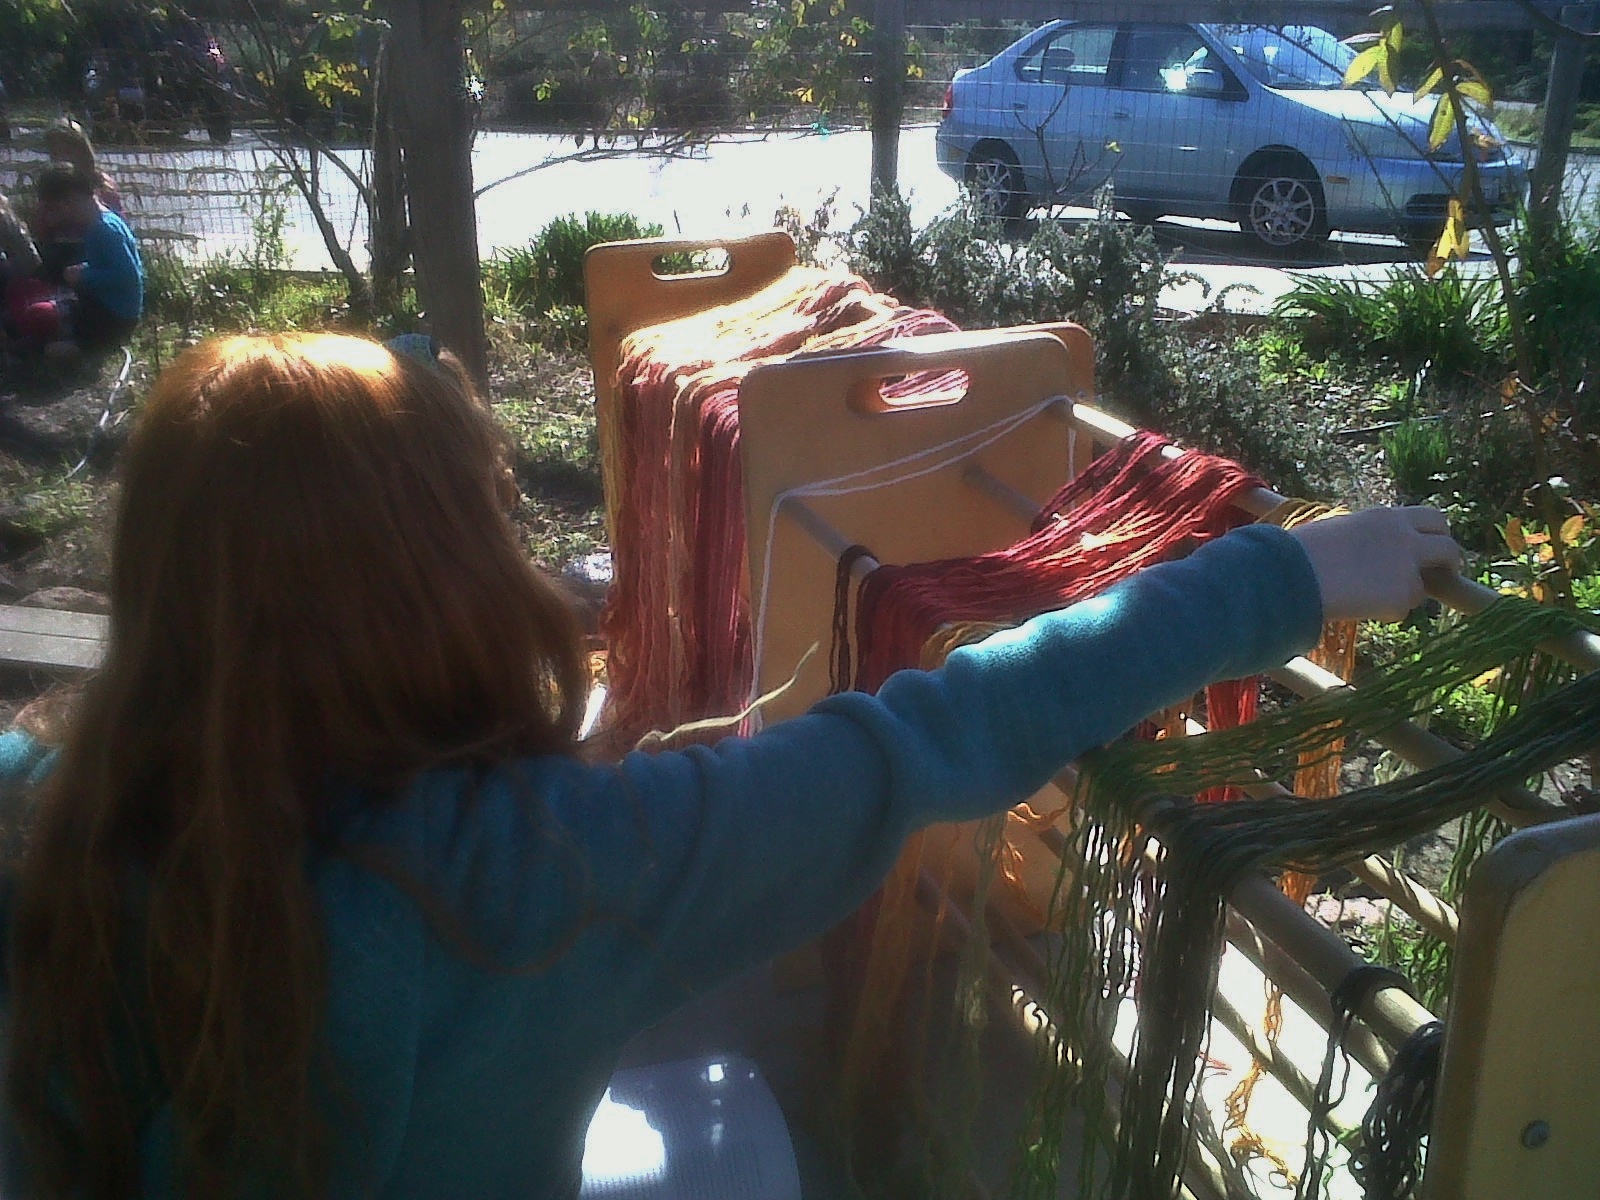
Choosing Natural Dyed Wool
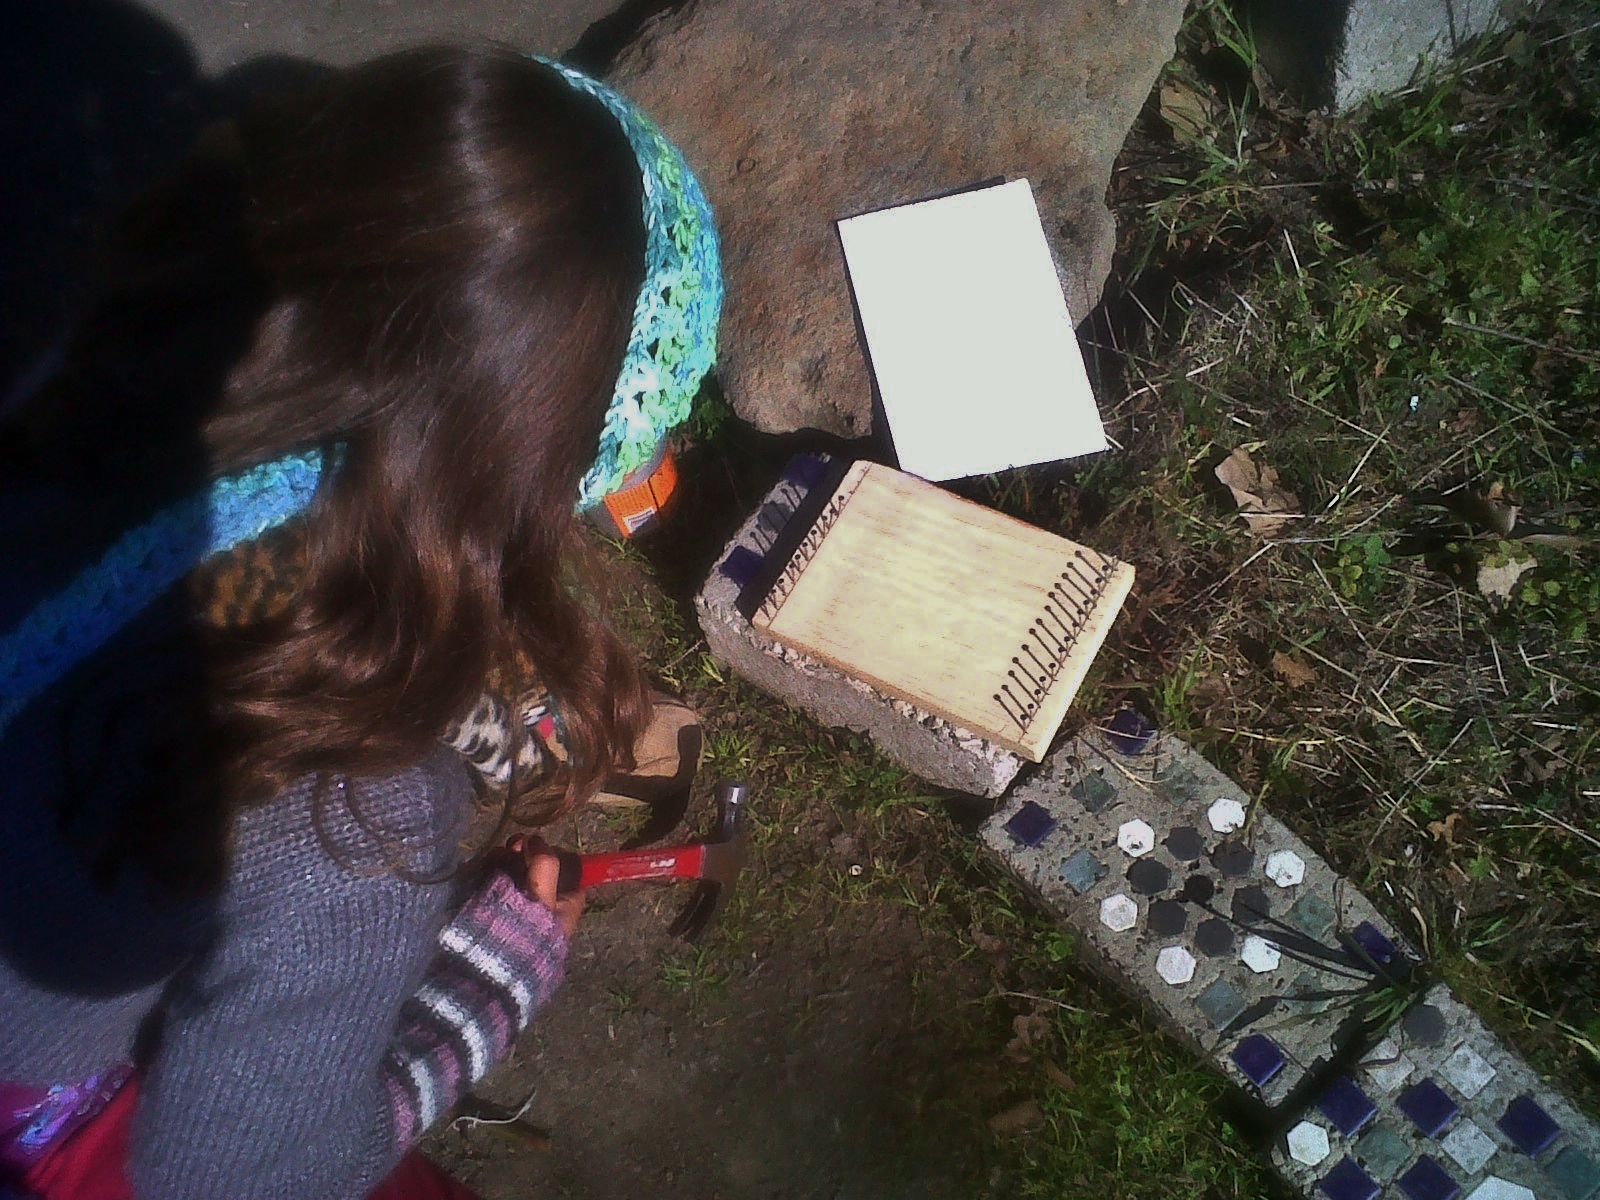
Building a Loom
Curriculum originally developed by Carolyn Brown. Written by Anastasia Sinclair
Loom building and weaving with natural plant dyes is a fun project for Grade 3 and up. In Grade 3, students will be studying textiles and measurement, and this is a fine project to practice skills inside during winter months. At Waldorf School of the Peninsula we start this project in January, after measurement has been introduced in Main Lesson.
This project could be modified for older students with larger finger looms. Mechanical looms and shuttles are introduced in the high school curriculum.
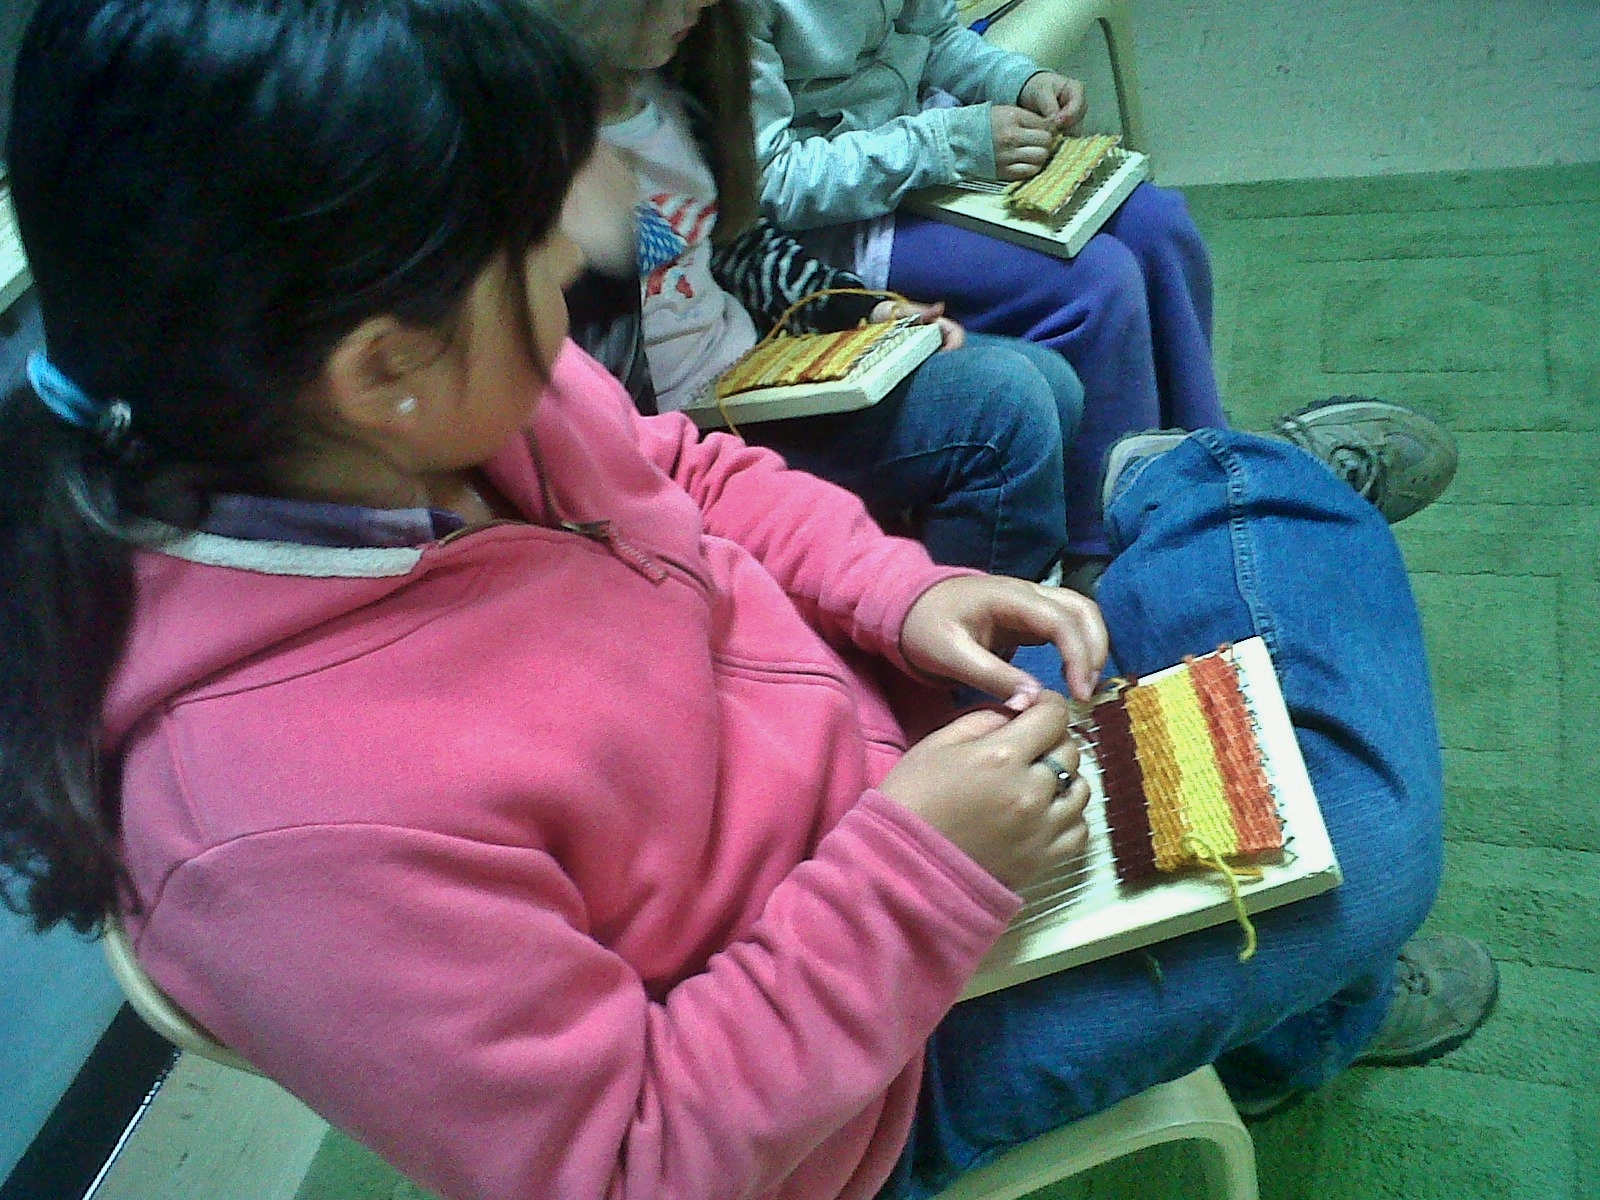
At Waldorf School of the Peninsula, the students from third grade and up also do garden-related woodworking. In Third grade they will begin by building small looms, which they measure and cut, around the time they are learning measurement in Main Lesson. They hammer in nails with accuracy, and string their looms to prepare for the hand-dyed wool. The students may choose the colors and patterns out of the selection given in class, and have freedom in whether they will use strips, a mirror or a random pattern, but must show careful skill in weaving, and correct any mistakes. Some students will spend weeks on just one weaving, others, will be inspired and do several in class and few more at home. A larger hand loom is sometimes brought in so the students can feel what it is like to work on it. Some students build small shuttles and experiment with these, but the weaving is always done by hand with large knitting wool. Parents are invited in to help build the looms, string the looms and start the students with weaving. For a class of 12 students, it is good to have three adults during these phases, as the work is challenging and requires attention. Once the students have begun weaving, a ratio of half the class (12-15 students) to 1 or 2 adults can be returned, and students can help each other.
Supplies needed:
Wood: interior grade 1×6 pine wood boards is a nice choice. I use the shorter boards (6 foot) and the students cut them to 8 inches long. Get some extra as some students will make mistakes cutting. Look for boards with as few knots and blemishes as possible.
T-squares with rulers. Metal is nice. 1 for every 1 or two students.
Saws. You will want almost 1 per student, unless you divide students up into partner groups of 2-3 so they can help each other and take turns, in which case you need one per group. Small wood handled saws that saw on the push and pull stroke.
Hammers. Lighter weight wood handled. One per student is ideal.
Pencils and sharpener.
Safety goggles.
Clamps: metal are nice. At least one per student.
Small scrap wood chunks to protect the loom wood from the clamps. One per clamp.
Saw horses and/or work benches or sturdy old desks which can stand some wear. Students can usually work with 3-4 students on two sawhorses. More than 4 would be unsafe.
Nails: small interior finishing nails. I prefer the 1 ¼ nails with a wider flat head.
Note: the students will need to mark off points on the loom for the nails. I usually measure a half inch (approx) down and then evenly divide the board up so that 14 nails can fit across it. I cut a piece of construction paper to size and make the marks on it, like a ruler. I give the students this “pallet” to use for simplicity. You could have the students measure and mark off the spaces for the nails themselves, and it can be any even number of nails that will fit across your board. An even number is important at the end of the project, when you will cut the holding strings and tie the end pieces together to hold the weaving.
